


The Ethereum Network switching from Proof of Work to Proof of Stake was a great change last year. However, some of its network participants who want to participate in its consensus process might have a hard time adjusting to this change, especially if you're a newbie. You've probably watched a few videos on YouTube on how to earn ETH as a Validator, and how to set up your own validator node, and all of that might be confusing. Or perhaps you're simply looking for a means to run your validator node in a way without worrying about any hardware upgrade that might come up as the Ethereum network is growing each day. Google Cloud Platform (GCP) offers an easy solution to that. GCP provides a way to run your node in the cloud, free from hardware setbacks, stressful management, and a few other issues that could arise from running your node on your PC. But before we get into that, let's have an understanding of what exactly we're trying to do here.
In the Ethereum network, Validators are network participants running a validator node on the network. A Validator node is a node that is responsible for validating transactions, proposing new blocks to be added to the blockchain, and validating blocks proposed by other validators on the network. Validators exist on blockchains that make use of the Proof of Stake consensus mechanism.
Google has evolved into the web3 space, and has launched a series of infrastructures for Web3 developers; including expanding Google Cloud services to allow running blockchain nodes.
In this guide, you will learn about Validators on the Ethereum network, how to set up and run your own validator node on the Goerli network; an Ethereum testnet network specifically for running validator nodes, and how to monitor your node. By the end of this guide, you will have an up-and-running validator node on GCP ready to start validating transactions.
Prerequisites
This guide is specifically tailored for beginners. We are going to walk you through the process of setting up your development environment, to running and monitoring the validator node. However, this guide will be easier to follow if you are comfortable using the terminal; since that is where we will mostly be working from, and have a basic knowledge of blockchain and its terminologies. Throughout this guide, "terminal" will refer to the SSH-in-browser, not the local terminal on your machine, unless stated otherwise.
Requirements
The following are required:
A GCP account with GCP credits.
32 (+1) Goerli ETH for staking and gas fees.
You can swap 0.0025 ETH for 33 Goerli ETH on LayerZero testnet bridge. It is important to create a new Ethereum account in a new/seperate Ethereum wallet for the purpose of this guide, and for running a validator in general. Do not use the account containing real ETH tokens to take part in this guide.
What is a Validator node?
The Ethereum network uses the Proof of Stake mechanism to achieve consensus. In this mechanism, a group of the network's participants who have downloaded a copy of the blockchain to their machine will deposit 32ETH, known as a stake in order to partake in the process of validating transactions on the network. This group of participants are known as Validators. Their responsibilities include:
Validating the transactions executed on the network by the other participants and smart contracts
Proposing a new block made up of the validated transactions to be added to the blockchain
Validating blocks proposed by other validators, and adding the validated blocks to the blockchain
Basically, they are responsible for maintaining the state of the network and ensuring that the network is safe from malicious actors.
How do I ensure the validator nodes are acting as they are supposed to?
You don't. Mostly because you don't need to. As mentioned before, to become a validator on Ethereum, you must stake 32 ETH. This is what ensures that the validators act right and carry out their responsibilities properly. If a validator tries to harm the network by let's say falsifying a transaction, trying to verify a false transaction or adding unverified transactions to the block they are proposing, other validators who have a copy of the blockchain on their machine would spot this error, and as a penalty, the validator's stake will be slashed. Similarly, if a validator is selected to add their block to the blockchain and they are not online, a small percentage of their stake will be deducted as a penalty. However, if a validator validates a correct transaction, they get rewarded by the network. This way, the cost of acting maliciously on the network is way too high and easily discoverable for anyone to attempt it. It's more profitable to just act right.
Importance of Validators
The most important part of a blockchain is decentralization. The backbone of decentralization is consensus; how network participants are able to agree on their governance and the state of the network. This is what makes validators so important, because they are responsible for achieving consensus on the network. Each blockchain network has it's own equivalent of validators, depending on the consensus mechanism used in the blockchain. Here are some of the reasons why validators are so important on the Ethereum network:
Validators actively participating on the network and maintaining proper behaviour contribute to the network's health
One of the major roles of validators is finalizing transactions and recording them on the blockchain. This finality adds immutability to the network, as it prevents data on the network from being easily manipulated.
The tokens staked by the validators contribute to the overall value of the network's cryptocurrency and help secure the network as well.
Decentralization: Validators greatly contribute to the decentralization of the network, reduce the risk of censorship, and strengthen the network against attacks.
Now that we understand what a validator node is, and its role in the Ethereum network, we can proceed to the next step // say what the next step is
How to Become a Validator
To run a validator node, you will need to run two software essentially:
An execution client
A consensus client
Setting up the node on Google Cloud
We are going to run our node on a Virtual machine on GCP. To set up this environment, we have to do the following:
Create an account on GCP
Create a new project on your account
Reserve a static IP address
Set up a Firewall
Create a Service account
Set up a new Virtual machine (VM) instance
SSH to VM
Let's take these steps one after another.
Create an account on GCP
To create and set up an account on GCP, follow these steps:
Head over to the Google Cloud Platform
On the top right of your screen, you should see a button labeled 'Start Free'. Click on the button to register a new account.
Sign in with your email and fill in the required details.
Fill in the details for your payment information and proceed to verify it.
Create a new Project on your account
Head over to the Console and click the dropdown at the top of your screen to create a new project.
Fill in the required details and be sure to select the project after creating it.
Note that you cannot change the details after your project is created.
Reserve a static IP address
Open the sidebar, hover on VPC NETWORK and select IP ADDRESSES.
Click on RESERVE EXTERNAL STATIC ADDRESS.
Fill in the following details then Click on RESERVE.
| Property | Value |
| Name | eth-validator-ip |
| Network Service Tier | Premium |
| IP version | IPv4 |
| Type | Regional |
| Region | us-west4 (Las Vegas) |
| Attached to | None |
Set up a Firewall
Open the sidebar, hover on VPC NETWORK and select Firewall.
Click on CREATE FIREWALL RULE.
Fill in the following details:
| Property | Value | | --- | --- | | Name | eth-validator-fw | | Logs | Off | | Network | default | | Priority | 1000 | | Direction of traffic | Ingress | | Action on match | Allow | | Targets | Specified target tags | | Target Tags | eth-validator-node (press enter to store the value) | | Source Filter | IPv4 ranges | | Source IPv4 ranges | 0.0.0.0/0 (press enter to store the value) | | Specified protocols and ports: | TCP: 30303,9000,8545 UDP: 30303,9000 |
Click on CREATE.
Create a Service Account
Open the sidebar, hover on IAM & ADMIN and select Service accounts.
Click on CREATE SERVICE ACCOUNT.
Under Service account details, fill in the following:
| Property | Value | | --- | --- | | Service account name | eth-validator-sa | | Service account ID | eth-validator-sa |
Click on CREATE AND CONTINUE
Filter and select the following roles:
Compute OS Login
Service Controller
Logs Writer
Monitoring Metric Writer
Cloud Trace Agent
Compute Network User
Click CONTINUE, then click DONE.
Set up a new Virtual machine (VM) instance
A VM is a sandboxed environment that emulates a physical computer. Here, you can decide what operating system you want to run, how much memory and storage space you need, network settings and all. It operates in such a way that although it is on your machine, none of the processes carried out on it affect anything on your machine. Therefore if your VM gets compromised, it won't affect the machine it is hosted on.
To create and set up a virtual machine on Google Cloud, follow these steps:
Open the sidebar on the GCP console and hover on "Compute Engine". Select VM instances and click on "CREATE INSTANCE".
Use the following configuration for the VM:
| Property | Value |
| Name | eth-validator-node |
| Region | us-west4 (Las Vegas) |
| Zone | us-west4-b |
| Machine Configuration | E2 |
| Machine type | e2-standard-4 (4 vCPU, 2 core, 16 GB memory) |
- Under Boot Disk, click on "CHANGE" and set the following values:
| Property | Value |
| Operating system | Ubuntu |
| Version | Ubuntu 22.04 LTS (x86/64, amd64) |
| Boot disk type | SSD persistent disk |
| Size (GB) | 2500 |
Under Identity and API access, select the service account we created.
Under Advanced Options, enter the following values for Networking:
| Property | Value | | --- | --- | | Network tags | eth-validator-node | | Network performance configuration | Network interface card: gVNIC |
Under default, enter the following values:
| Property | Value (type or select) | | --- | --- | | External IPv4 address | eth-validator-ip |
Click on CREATE to create your VM
SSH to VM
You should see your new VM instance created under VM instances. Click on SSH to SSH into the VM.
Setup and Installations on the VM
Create a Swap file
While creating our VM, we specified the memory to 16GB. In some cases, the VM might require more RAM to carry out processes efficiently, so we will create a 25GB swap file to prevent memory shortage. Follow these steps to create a swap file:
Run the following command to create a swap file:
sudo dd if=/dev/zero of=/swapfile bs=1MiB count=25KiBUpdate permissions to be readable and writable by only the owner.
sudo chmod 0600 /swapfileConfigure the system to use
/swapfileas a swap partition.echo "/swapfile swap swap defaults 0 0" | sudo tee -a /etc/fstabActivate the swap file we just created.
sudo swapon -aConfirm your VM recognizes the swap file and can access it
free -g
You should see something similar to the image below:
Create a new user on the VM
We are going to create a new user for our validator node. This is to secure our node because if we use the root account which has unrestricted access to all files and directories, any mistake made can result in extreme consequences for the entire system. Additionally, we can associate different users with different roles, and easily track activities on our system. Follow these steps to create a new user:
Create a new user named "ethereum"
sudo useradd -m ethereumGive the user 'ethereum' administrative privileges:
sudo usermod -aG sudo ethereumGive the user 'ethereum' google cloud administrative privileges:
sudo usermod -aG google-sudoers ethereumSwitch to the user 'ethereum':
sudo su ethereumStart bash:
bashSwitch to the home directory
cd ~
Install an Execution client (Erigon)
An execution client is a software used for processing and executing transactions and smart contracts on the Ethereum blockchain. There are a number of execution clients that we can use such as Erigon, Geth, Besu, and Nethermind but we are choosing Erigon to maintain decentralization. It is important to not choose the most popular execution client in order to maintain diversity so that one client does not control up to 66% of the network. You can check the client distribution here.
Before we can install Erigon we need to have the following installed:
Go (version 1.19 and above)
make
To install Go, head to their website to get the latest version of Go. Since we're running a VM, if you click on "download", it will download Go to your local machine. While we can do that, then upload the file to your VM, it is much easier to just download it from the terminal. Follow these steps to install Go:
Under the "Featured downloads" section, Right-click on the Linux option and select "copy link address".
Run this command on your terminal to download Go:
wget <LINK-YOU-COPIED>Extract the contents
sudo tar -xvf ./<FILE-NAME>You can check the file name by running
lsin the directory downloaded Go. You'll see the tar file and the extracted file. The extracted file is what you should replace the <FILE-NAME> placeholder with.Clean up:
sudo rm -rf <FILE-NAME>Add Go to $PATH:
export PATH=$PATH:/usr/local/go/binRun
go versionto verify the installation was successful. It should return the version of Go you just downloaded
Next, we will install make. To install make, run this command:
sudo install apt make
Verify make has been installed by running make --version. You should see the version of make you have installed on your VM. Now that we have installed the required software for installing Erigon, let's proceed to install Erigon.
Clone the repository by running:
git clone --branch stable --single-branch https://github.com/ledgerwatch/erigon.gitChange the directory to the Erigon repository you just cloned:
cd erigonBuild Erigon:
make erigonRun the Erigon binary file:
./build/bin/erigonCreate a data directory to store all the blockchain data for Erigon.
sudo mkdir -p /var/lib/erigonSet ownership for the data directory to the current user.
sudo chown $USER:$USER /var/lib/erigon
Install a Consensus Client (Lighthouse)
A consensus client is a software that provides the functionality required for a validator to carry out their duties such as validating transactions, proposing a block, or validating a proposed block.
We are choosing Lighthouse as our execution client out of other clients like Teku, Nimbus, and Prysm in order to maintain decentralization on the network. Follow these steps to install Lighthouse on your VM:
Head to the Lighthouse documentation page here.
Scroll down to the Binaries section, then right-click on the Linux binary and copy the link to the file.
Download the file by running:
wget <LINK-YOU-COPIED>Extract the contents:
sudo tar -xvf ./<FILE-NAME>Move lighthouse to
/usr/local/binso that it can be executed from anywheresudo cp lighthouse /usr/local/binClean up:
sudo rm -rf <FILE-NAME>Create a directory to store blockchain data for Lighthouse.
sudo mkdir -p /var/lib/lighthouse
Running the node
The process of running a node involves connecting the execution and consensus client, this connection makes up what we will refer to as the "validator". Then connecting the validator to a beacon client. To enable secure communication between the consensus and execution client, we will make use of a JSON Web Token (JWT).
Create a JSON Web Token (JWT)
First, ensure you are in the home directory by running cd ~. Then follow these steps to create a JWT.
Create the directory you will store your JWT in. We will name ours "secret"
mkdir ~/.secretCreate the JWT file within the "secret" folder.
openssl rand -hex 32 > /secret/jwtsecretEnable read access since it is a secret file.
chmod 440 /secret/jwtsecret
To view your JWT, you can run sudo nano chmod 440 ~/.secret/jwtsecret. This will use nano to open up the file containing your JWT. Use CTRL + X to exit nano. If you are prompted, enter 'n' and click the "enter" button. It means you have made changes to your JWT, and we do not want to do that.
Configure Erigon
Now, we are going to configure Erigon as a service using systemd.
Create the service configuration file for Erigon
sudo nano start_erigon.serviceAdd the configuration settings.
 [Unit]
 Description=Erigon (Execution client)
 Wants=network-online.target
 After=network-online.target

 [Service]
 Type=simple
 User=$USER
 Restart=always
 RestartSec=5
 KillSignal=SIGINT
 TimeoutStopSec=300
 ExecStart=/home/ethereum/erigon/build/bin/erigon \
  --datadir /var/lib/erigon \
  --chain goerli \
  --metrics \
  --pprof \
  --prune htc \
  --authrpc.jwtsecret=/secrets/jwtsecret \
  --externalcl \
  --http.addr="0.0.0.0" \
  --http.port=8545 \
  --http.api=engine,net,eth

 [Install]
 WantedBy=multi-user.target
Save the file with CTRL + X
--datadirspecifies the directory Erigon will store its data.--chainspecifies the Ethereum chain to use. We are using Goerli.--metricsenables metrics reporting for monitoring purposes.--pprofenables pprof profiling.--prunesets the pruning model to htc.--authrpc.jwtsecretspecifies the path to the JWT file we created.--externalclenables connections between the external consensus client and the engine client.--http.addrenables the HTTP server's address.--http.portsets the HTTP port to be used.--http.apispecifies the enabled APIs.Move the Erigon configuration file to the systemd directory
sudo mv $HOME/erigon.service /etc/systemd/system/start_erigon.serviceEnable read access
sudo chmod 644 /etc/systemd/system/start_erigon.serviceReload the daemon
sudo systemctl daemon-reloadStart Erigon
sudo systemctl start start_erigonCheck the logs to ensure that everything is working properly
journalctl -fu start_erigon
To stop Erigon, run
sudo systemctl stop start_erigonTo check the state, run
sudo systemctl status start_erigon
Become a Validator
Now that we have Erigon up and running, here are the next steps to take to become a validator:
Create validator keys
Import validator keys into Lighthouse
Start Lighthouse
Configure the Lighthouse beacon node
Configure the Lighthouse Validator
Connect the validator to a beacon node
Stake 32 Goerli ETH
Let's go over them one by one
Create validator keys
We are going to look at two ways of creating a validator key:
From the command line using
staking-deposit-cliUsing the Wagyu key generation app
If you're more comfortable using a visually appealing method to create your keys, then Wagyu may be more suitable for you.
Using staking-deposit-cli
Head over to the Ethereum staking deposit cli repository here
Scroll down to "assets", then right click and copy the link address for the latest Linux amd64 version.
Download the tar file by running this command in your terminal:
wget <LINK-YOU-COPIED>Extract the tar file.
sudo tar -xvf ./<FILE-NAME>Clean up.
sudo rm -rf <FILE-NAME>Navigate to the staking deposit directory.
cd ./staking-deposit-cliRun the following command to launch the cli.
./deposit new-mnemonic --num_validators 1 --chain goerli --eth_withdrawal_address <YOUR-WITHDRAWAL-ADDRESS>Select the language of your choice. For example, input 3 for English. Do not store your mnemonic online, this includes storing them on a device with an internet connection and taking screenshots. Write it down and store it in a safe place.
You will be prompted to set your withdrawal address. Input the same address you used in the previous command. It is important to use a different wallet, separate from the wallet you use to hold tokens, to create the account for your withdrawal.
You will be prompted again to confirm your execution address. This is the same as the withdrawal address, so input the same address you just used.
Your keys will be created and stored in
/home/ethereum/staking_deposit_cli/validator_keys. Press any key to exit.
Click on the "DOWNLOAD FILE" button on the top right of your screen. Enter the file path for the "deposit_data" JSON file and click on "Download". The file will be downloaded to the local downloads folder on your machine
Using the Wagyu key generation app
Wagyu is going to be installed on your machine locally, not on the VM.
The commands to install Wagyu are meant to be run on your local terminal, not the SSH-in-Browser.
To run Wagyu, you need to have libfuse2 installed. Run the following commands on your local terminal to install libfuse2:
sudo add-apt-repository universe
sudo apt install libfuse2
Confirm you have libfuse2 installed by running libfuse2 --version. This should return the version of libfuse2 you have installed. Now let's proceed to downloading and installing Wagyu.
Head over to the Wagyu repository here and follow the instructions provided there to install Wagyu on your machine.
After installing Wagyu, it is recommended to be offline for safety reasons during the process of generating your validator keys.
Open Wagyu. On the top right, click on "MAINNET" and select "GOERLI" from the options. Then click on "CREATE NEW SECRET RECOVERY PHRASE"
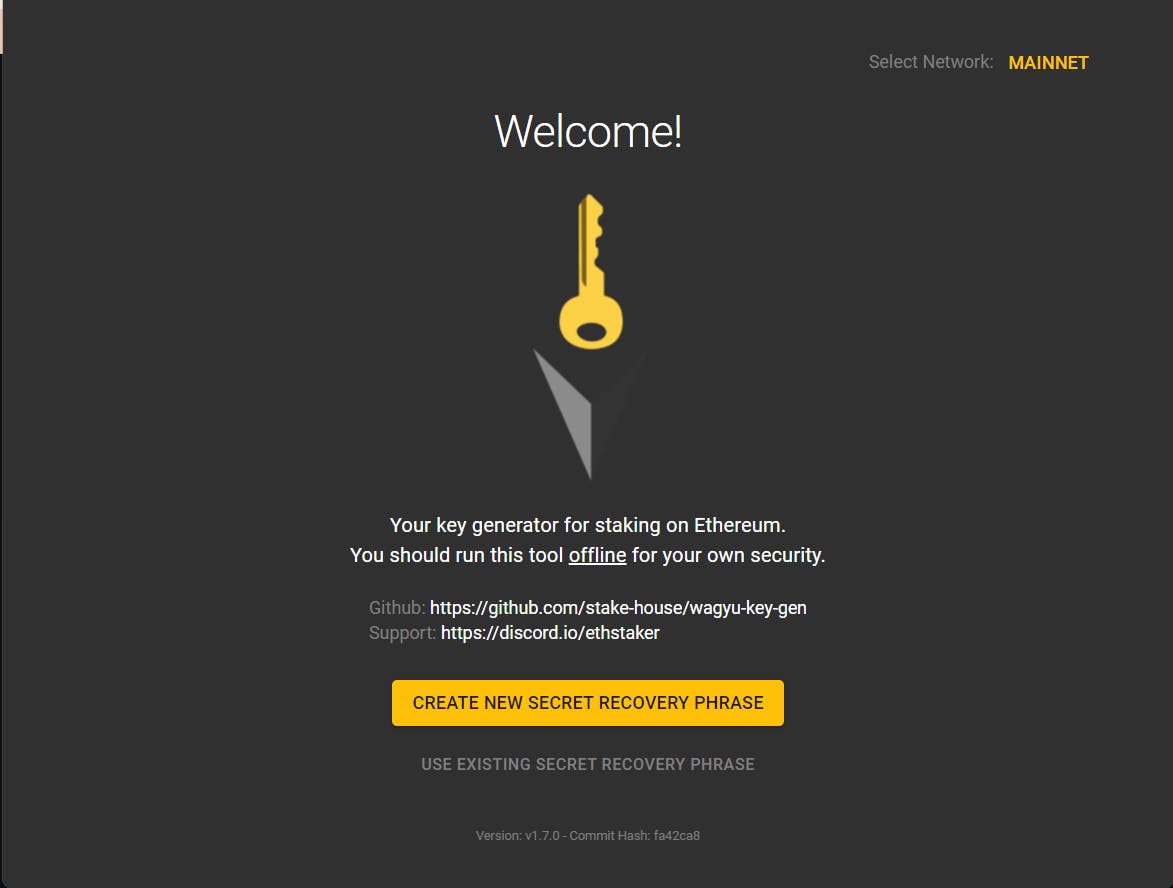
Click on "CREATE" to create your secret recovery phrase

Copy down your secret recovery phrase safely and click on the "NEXT" button to verify you have saved your keys. Do not take a screenshot of your recovery phrase or store it online or on a device with an internet connection.
Once you complete the verification process, the next step is to set the number of keys you want to create, a password, and a withdrawal address. We are creating one key here. Fill in your password and your withdrawal address, then click on the "NEXT" button

You will be prompted to retype your password.
Finally, you will be asked to select a folder to store your keys. You can choose any folder of your choice for now, since we are going to upload it to the VM. Later, you will use Google KMS to safely store your keys.
Open up your SSH-in-browser and create a directory to store your keys.
sudo mkdir validator-keysClick the "UPLOAD FILE" button on your top right. When prompted to choose a file, navigate to the directory where your keys are stored and select the file beginning with "keystore-m". Then click upload to upload your file.
Move the file to the validator keys directory you created.
sudo mv <keystore-file> <validator-keys>
Import validator keys into Lighthouse
Remember the validator keys created were stored in home/validator-keys. To import the keys, run the following command:
sudo /usr/local/bin/lighthouse --network goerli account validator import --directory $HOME/validator-keys --datadir /var/lib/lighthouse
You will be prompted for a password. Choose a long and unique password that is a mix of characters. Consider storing your password with Google Password Manager. After entering your password, it will be stored as plain text in the same directory as your validator keys so you are not prompted to enter the password each time the validator client restarts.
Configure Lighthouse Beacon Node
In this process, we are going to create a new user for the beacon client, then create a configuration file for Lighthouse that connects Lighthouse with Erigon, and to the beacon chain.
Create a new user for the beacon node
sudo useradd --no-create-home --shell /bin/false lighthousebeaconCreate a new directory for the beacon node:
sudo mkdir -p /var/lib/lighthouse/beaconSwitch owner to the new user
sudo chown -R lighthousebeacon:lighthousebeacon /var/lib/lighthouse/beaconCreate a service configuration the Beacon node
sudo nano /etc/systemd/system/lighthousebeacon.serviceAdd the following configuration settings and save it.
[Unit] Description=Lighthouse Beacon Node Wants=network-online.target After=network-online.target[Service] [Service] User=lighthousebeacon Group=lighthousebeacon Type=simple Restart=always RestartSec=5 ExecStart=/usr/local/bin/lighthouse bn \ --datadir /var/lib/lighthouse \ --http \ --network goerli \ --metrics --execution-endpoint http://localhost:8551 \ --execution-jwt /secrets/jwtsecret \ --checkpoint-sync-url https://prater.checkpoint.sigp.io \ [Install] WantedBy=multi-user.target--datadirspecifies the directory where the Lighthouse beacon node will store its data--httpenables the HTTP server and allows us to interact with the node via HTTP requests.--networkspecifies the Ethereum network to use. In this case, Goerli--metricsenables metrics reporting for monitoring purposes.--execution-endpointspecifies the execution client endpoint URL that the beacon node will communicate through.--execution-jwtspecifies the path to the JWT file we created--checkpoint-sync-urlspecifies the URL for the checkpoint sync service that will provide the beacon node with historical data.Reload the daemon
sudo systemctl daemon-reloadStart the Lighthouse beacon node and check the state
 sudo systemctl start lighthousebeacon
 sudo systemctl status lighthousebeacon
Check the logs
sudo journalctl -fu lighthousebeaconEnable the lighthouse beacon service
sudo systemctl enable lighthousebeaconAdd a new user for the validator
sudo useradd --no-create-home --shell /bin/false lighthousevalidatorChange the owner for the folder
sudo chown -R lighthousevalidator:lighthousevalidator /var/lib/lighthouse/validators
Configure Lighthouse validator
After you have started the beacon node, the next thing to do is to start lighthouse as a validator client to sync to the execution and beacon node (find our more about this step and if it is necessary)
Create a service configuration file for the Lighthouse Validator
sudo nano /etc/systemd/system/lighthousevalidator.serviceAdd the following configurations to the "lighthousevalidator.service" file
[Unit] Description=Lighthouse Validator Wants=network-online.target After=network-online.target [Service] User=lighthousevalidator Group=lighthousevalidator Type=simple Restart=always RestartSec=5 ExecStart=/usr/local/bin/lighthouse vc \ --datadir /var/lib/lighthouse \ --network goerli \ --suggested-fee-recipient 0x43C88693AC2ce26a5C9965f63B56Bebb0f22D5Ff \ --graffiti "Wagmi!" [Install] WantedBy=multi-user.target--datadirspecifies the data directory where the Lighthouse Validator will store its data.--networkspecifies the Ethereum network to connect to. In this case, Goerli.--suggested-fee-recipentspecifies the withdrawal address to use--graffitisets the graffiti message that your validator will send when it produces a block.Save the configuration file with CTRL + X. Enter y to save the changes, then click "Enter" to confirm.
Reload the daemon
sudo systemctl daemon-reloadStart the validator service and check the status
 sudo systemctl start lighthousevalidator
 sudo systemctl status lighthousevalidator
Check the logs to confirm that the validator is working as expected.
sudo journalctl -fu lighthousevalidatorEnable the Validator
sudo systemctl enable lighthousevalidator
Submit deposit
Head over to launchpad to make your deposit.
On the top right of your screen, ensure that the network selected is Goerli and not Mainnet. Click on "Become A Validator"
On the next page, Click on "Continue" after you have carefully read the note on Proof of Stake.
Carefully read through and understand each condition required for validators and Click on "I Accept" to accept each of the conditions stated one by one. Then click on "Continue" to proceed to the next stage
Select Erigon as your execution client. Scroll to the bottom of the screen and click "Continue"
On the next page, Select Lighthouse as your consensus client and click on "CONTINUE" to proceed.
Set the number of validators to 1

Input the same withdrawal you used when creating your validator keys.
Select Linux as your Operating System.
Select the method you used to generate your keys then scroll to the bottom of your screen and check the box to confirm your keys are safe.
Click "CONTINUE" to proceed.
Upload the "deposit_data" json file that was generated when you created your validator keys. and click on "CONTINUE".

Click on Metamask to connect your wallet containing the account with 32 Goerli ETH.
Check the checkboxes after reading the texts.

Confirm the deposit

The transaction status should show "Transaction started". When it is done, it will change to "Transaction successful". Click on CONTINUE to proceed.

It should show that your stake has reached the deposit contract

Complete the Staker checklist to confirm that you have met all the steps to become a validator on the Goerli testnet.
Note that it will take a few days before your validator is confirmed and activated.
Monitoring your node
Now that our node is up and running, the next thing to do is to set up monitoring services to monitor our node.
We are going to set up three services to monitor our node:
Prometheus
Grafana
Uptime Checks and Notifications with Google Cloud
Let's take them one by one.
Set Up Prometheus for Node Monitoring
Prometheus is a monitoring and alerting toolkit that works by collecting and storing time-series data from various sources, then providing valuable insights into the performance, health, resource utilization, and behavior of the systems or applications it is monitoring.
Follow these steps to install and configure Prometheus on your VM:
Head over to the Prometheus website to download it.
Right-click on the "Download Prometheus" button to copy the download link address
Download Prometheus by running the following command in your terminal:
wget <LINK-YOU-COPIED>Extract the tar file
sudo tar -xvf <FILE-NAME>Copy the extracted files to /usr/local/bin by running the following commands one by one:
 sudo cp <FILE-NAME>/prometheus /usr/local/bin/
 sudo cp <FILE-NAME>/promtool /usr/local/bin/
Copy the directories to the
/etc/prometheusdirectory.sudo cp -r <FILE-NAME>/consoles /etc/prometheus sudo cp -r <FILE-NAME>/console_libraries /etc/prometheusClean up the extracted files. Run
lsin the directory you downloaded and extracted the Prometheus file to show the file names.rm <tar.gz-FILE> rm -r <FILE-NAME>Add a new Prometheus user named prometheus.
sudo useradd --no-create-home --shell /bin/false prometheusCreate a directory to store the logs.
sudo mkdir -p /var/lib/prometheusCreate a configuration file for Prometheus
sudo nano /etc/prometheus/prometheus.ymlAdd the configurations for Prometheus
global:
  scrape_interval: 15s
scrape_configs:
  - job_name: prometheus
    static_configs:
      - targets:
          - localhost:9010
  - job_name: lighthouse
    metrics_path: /metrics
    static_configs:
      - targets:
          - localhost:5054
  - job_name: erigon
    metrics_path: /debug/metrics/prometheus
    static_configs:
      - targets:
          - localhost:6060
Change the file ownership for the Prometheus configuration to the user we created
sudo chown -R prometheus:prometheus /etc/prometheus
sudo chown -R prometheus:prometheus /var/lib/prometheus
Create a service configuration file for Prometheus.
sudo nano /etc/systemd/system/prometheus.serviceAdd the configurations.
[Unit]
Description=Prometheus
Wants=network-online.target
After=network-online.target

[Service]
Type=simple
User=prometheus
Group=prometheus
Restart=always
RestartSec=5
ExecStart=/usr/local/bin/prometheus \
  --storage.tsdb.path=/var/lib/prometheus \
  --config.file=/etc/prometheus/prometheus.yml \
  --web.console.templates=/etc/prometheus/consoles \
  --web.console.libraries=/etc/prometheus/console_libraries \
  --web.listen-address=:9010

[Install]
WantedBy=multi-user.target
Reload the daemon.
sudo systemctl daemon reloadStart Prometheus and check the state.
sudo systemctl start prometheus
sudo systemctl status prometheus
Check the logs to ensure that Prometheus is working as expected
sudo journalctl -fu prometheusEnable Prometheus.
sudo systemctl enable prometheus
Configuring Grafana Dashboards
Grafana is a platform for monitoring that allows you to visualize and analyze data in the form of interactive and customizable dashboards. To install Grafana, we need to have Grafana apt repository installed. This will enable us to install and update Grafana easily using the Advanced Package Tool (APT).
Install Grafana apt repository.
 wget -q -O - https://packages.grafana.com/gpg.key | sudo apt-key add -
 sudo add-apt-repository "deb https://packages.grafana.com/oss/deb stable main"
Refresh the repository.
sudo apt updateEnsure that it is still installed from the repository after refreshing.
apt-cache policy grafanaInstall Grafana.
sudo apt install -y grafanaConfirm Grafana is installed and it is the latest version.
grafana-server -vYou can check the latest version of Grafana here to ensure it is the one you have installed.
Start the Grafana Server and check the state.
 sudo systemctl start grafana-server
 sudo systemctl status grafana-server
Check the Grafana logs to ensure it is working as expected.
sudo journalctl -fu grafana-serverEnable Grafana server.
sudo systemctl enable grafana-serverHead over to http://localhost:3000 to view your Grafana Dashboards. User and password are admin by default.
Configure Grafana with Prometheus
To create a new dashboard you first need to add a data source.
Hover on the Configuration icon at the bottom left of your screen and click on "Data sources".
Click on "Add data source" and select Prometheus.
In the configuration, change the URL field under HTTP to the port we set in our Prometheus configuration file:
http://localhost.9010Click on "Save & Test".
Download these Grafana dashboard configuration files for Erigon and Lighthouse to your machine:
Hover on the Dashboards icon on the top left of your screen and select "Import".
Import the files we just downloaded.
You should be able to see your dashboards once your validator is confirmed and active.
Uptime Checks with Google Cloud
We will set uptime checks on google cloud to monitor uptime failures in our node. However, If the validator stops receiving duties then it is still functioning, and there is probably a bug in your setup, but you can use Grafana alerts to monitor that.
Head back to the Google Cloud console
Open the sidebar and scroll down to the Operations section. Hover on "Monitoring" and click on "Uptime Checks".
Click on "Create Uptime Check"
Fill in details
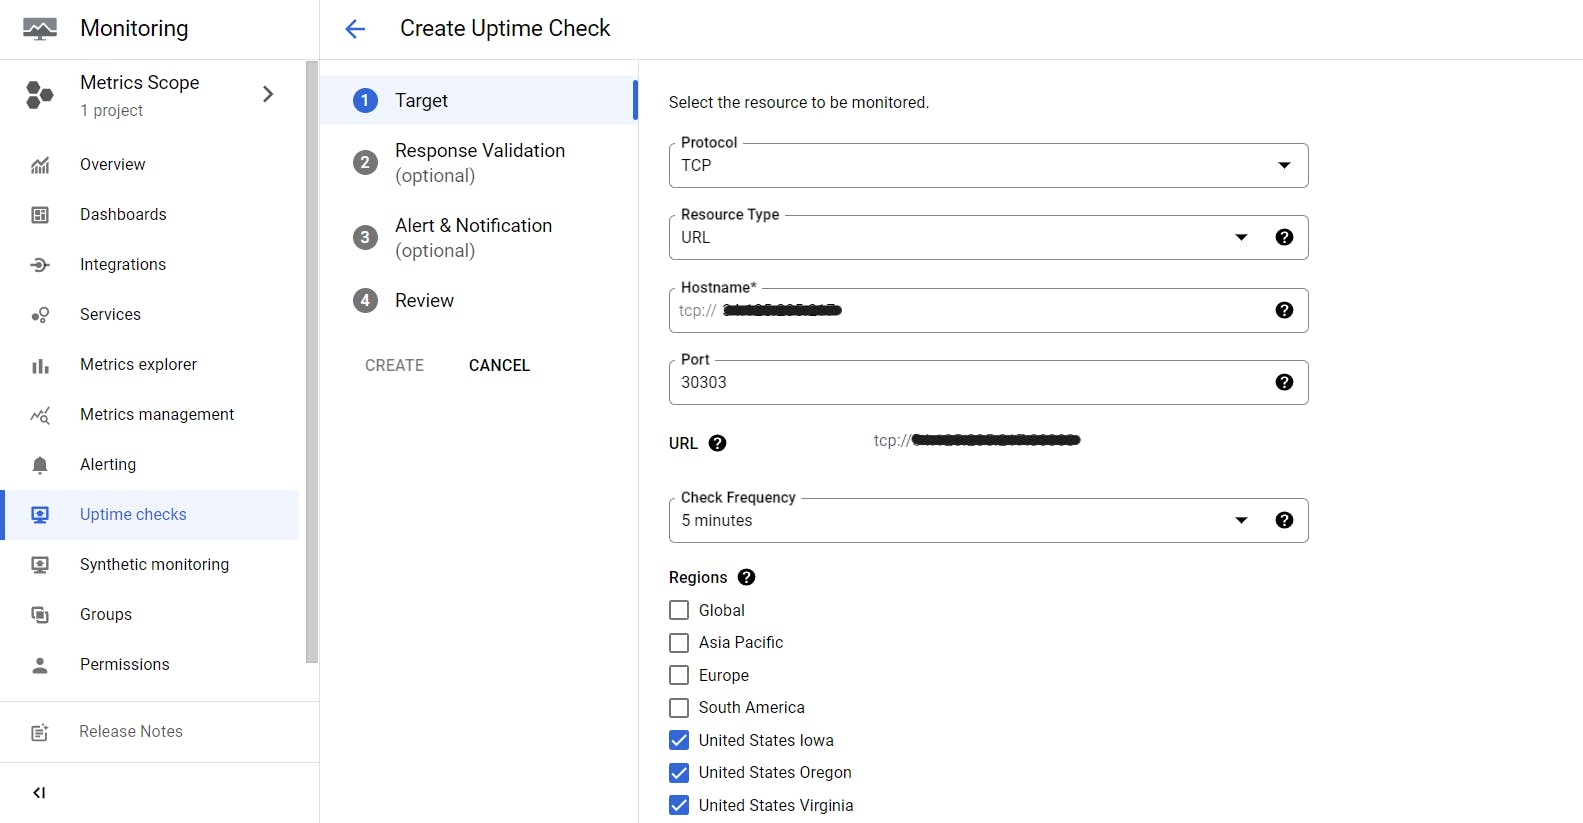
Click on "CONTINUE"
In Response Validation, the response timeout is set to 10 seconds already, so click on Continue to proceed.
In Alerts and notifications, set the name to "Validator uptime failure", the duration should be set to one minute, then click on the "Notification channel" dropdown and select "Manage notification channels" to set how you will receive your notifications.
The Notification Channels page shows the types of notification channels that are available like Slack, SMS, email, and so on. Choose the channels you're comfortable with and provide the required details.
Head back to the "Create Uptime Check" page and refresh the notification channels dropdown to reflect the notification option(s) you just configured.
Select the option(s) and click "CONTINUE".
In the "Review" option, create a name for your uptime check. We will name it "Validator Uptime Check".
Click on "TEST" to test that it works.
Manage your Validator keys with Google Key Management Service (KMS)
To manage our validator keys, we are going to use Google KMS, a virtual key manager that enables us to manage and protect our keys securely on the Google Cloud environment. Since our validator keys are already created, we will be using the Key Import service to manage our keys.
Head over to the Key Import page and follow the instructions to import and manage your validator keys.
Don't forget to delete the key files on your machine after you complete the backup process.
Conclusion
Congratulations! You made it to the end! At this point, your validator should be up and running unless you're still waiting to be activated.
In this guide, we have learned about Validators on the Ethereum network, and successfully run our own validator node on the Google Cloud Platform, as well as monitor your node. If you've diligently followed the steps to run your validator on the testnet, you should be ready to run a validator on the Ethereum Mainnet. Happy Staking!